Start Smart: Set Our Camera for Buck Success
We will walk through field-tested settings and setup strategies to trap more mature BUCKS on camera. Our decades of hunting sharpen trigger timing, improve night images, and produce consistent, actionable photos for stands and scouting.
What We Need

Trail Camera Placement Guide: Best Spots and Quick Tips for Hanging
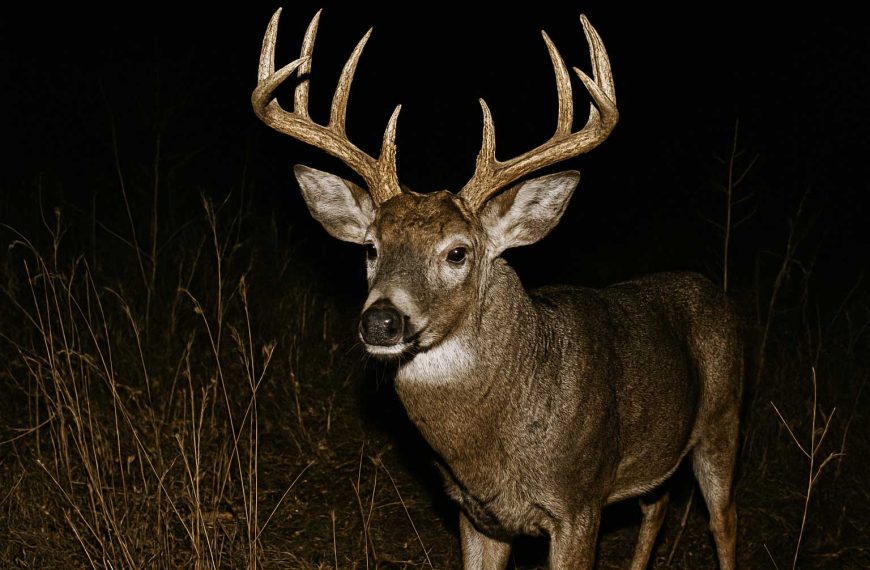
Choose the Perfect Vantage: Where Bucks Travel
Want to place cameras where bucks practically walk into frame?Scout travel corridors, pinch points, and food sources — don’t guess. We look for rubs, scrapes, hoof tracks, and fresh droppings; those signs tell us where bucks focus activity.
Look for these high-traffic spots:
Place cameras off the trail’s centerline, about chest height, angled slightly downward for clean framing and fewer false triggers from weeds. Avoid setting cameras deep in thick bedding or directly across from dense underbrush; those rarely catch cruising bucks.
Mount multiple cameras to cover both approaches and escape routes — we once put two cameras on a saddle and started getting daylight photos of a mature 8‑point within three nights. Adjust placement a few yards over several days based on real photos until mature bucks appear consistently.

Dial In Settings: Get the Right Shot, Every Time
Why leave resolution, trigger speed, or delay to chance when tuning earns more bucks on camera?Set photo resolution to high so we can ID antler detail—think 12MP+ or the camera’s top JPEG/RAW option. Favor short video clips only where legal; video is great for behavior but eats batteries fast. Lower trigger delay to the minimum the unit supports; every 0.2–0.5s counts. Use burst mode (3–5 shots) to increase odds of a full-frame buck.
Adjust PIR sensitivity to high in cold months and medium in warm months to cut false triggers from heat shimmer. Balance night IR power: choose long-range for open fields and low-glow/no-glow for close, thick cover to avoid spooking.
Enable timestamp and temperature logging. Lock settings with a password or note the exact setup in our log. Test settings with day/night walk-tests before final placement.

Outlast the Season: Power and Storage Tricks
Want weeks of continuous monitoring without a battery panic? Here’s how we make cameras run longer than our patience.Prioritize power planning so our cameras record when bucks peak.
Pack a compact USB charger with us at all times.

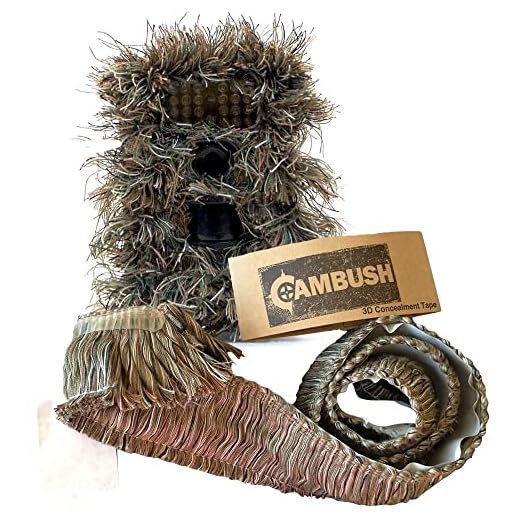
Mounting and Camouflage: Hide the Tech, Keep the Bucks
Think a cam is invisible? Spoiler: Bucks notice. Here’s how we keep cameras stealthy and sneaky.Mount cameras using silent straps or brackets and tighten until they no longer move. Break up camera outlines with natural materials or matte spray — never coat the lens or IR window. Face cameras slightly downstream of the prevailing wind to reduce scent transfer and wear scent-free gloves on every visit.
Set height between 36–48 inches based on terrain and buck chest height (example: 38″ on flat trails, 46″ on uphill run-ins). Angle the camera toward the trail center to catch broad chest-on shots.
Avoid fasteners that rattle; use rubber shock pads or tight straps and re-check after heavy wind. Mask mounting noise by moving quietly and finishing with soft, deliberate motions. When bucks are wary, leave the site for at least 24 hours before expecting normal activity.
Time It Right: Capture Rut Peaks and Evening Movement
Want photos when bucks are cruising? Small timing tweaks deliver huge action boosts.Track movement by exporting timestamps and building a simple heat map of activity windows. For example, we exported two weeks and found a consistent 30–45 minute spike after sunset.
Use time-lapse sparingly at feeding areas (1–3 minute intervals at dawn/dusk) to catch quick transient moments we normally miss.
Adjust nighttime sensitivity and trigger speed to sharpen dawn/dusk captures; reduce IR intensity if images wash out at close range and test changes for 48 hours.
Compare weekday vs. weekend patterns to spot human disturbance and alter access times or camera placement.
Shift cameras to travel corridors during the rut and reduce daily checks to avoid spooking mature bucks.
Vary camera angles slightly between visits and combine photos with weather, moon phase, and feeding schedules to predict peak windows and prioritize mobile hunts.

Analyze, Secure, and Iterate: Turn Pictures into Plans
We don’t just collect photos—we exploit them. Ready to turn pixels into hunts?Review photos and videos methodically to spot travel routines, peak times, and preferred trails. Export timestamps and highlight repeated windows—this tells us when bucks move.
Tag images by buck class and behavior. Label shots like “8pt — 140”, “rubbing”, or “does present” so we track antler size, point spread, and aggression over time.
Map frequent locations for stands or blinds. Pin hotspots on a simple map or app and move a ground blind 30–50 yards uphill if a buck consistently approaches from a new angle.
Secure cameras before leaving the woods:
Debrief as a team after each deployment, noting wins and failures. Iterate camera placement, settings, and check frequency. Build a running database across seasons to predict maturation cycles and steer ethical, educated harvest plans.

Refine and Repeat
We refine placement, settings, and routines season after season, turning trail cameras into our most reliable scouting partners; give this system a try, share your photos and insights, and join us in pursuing trophy bucks.

Long feedback below — tried to be detailed:
1) Start Smart section convinced me to pre-scout; I spent two hours mapping funnels and it paid off.
2) For power, rechargeable lithium AAs lasted way longer than alkalines for me.
3) Mounting: I used a 45° downward tilt to avoid sun flare in mornings — golden.
4) A shortlist of “do nots”: don’t mount at eye level, don’t point at open fields with heavy sunlight, and always clear brush in front of the sensor.
Thanks for the practical tips — the guide is thorough but could use a quick printable checklist!
Excellent field report — the 45° tilt trick is a nice addition. A printable checklist is a great idea; we’ll consider adding one.
Agree on lithium AAs. I switched and it’s been night and day (pun intended).
Printable checklist would be clutch. I keep forgetting to bring extra zip ties every single time 😂
Two things I wish the guide had more of:
1) Specific battery life estimates per setting
2) How to manage moisture in humid climates
Otherwise a very practical guide.
I got a little silica gel pack and taped it inside the battery compartment. Saved me from a few fogged lenses.
Valid points. Battery life varies by model and settings, but as a rule: high-res + fast trigger = more drain. For moisture, we recommend desiccant packs in the housing and sealing any cable entry points with silicone.
For battery estimates: try running one logging session with your chosen settings to get a real-world baseline before committing.
Short and sweet: the “Analyze, Secure, and Iterate” part changed how I hunt. Reviewing weekly and tweaking angle/pattern led to 30% more captures of mature bucks in my spots.
I use a simple Google Sheet and tag photos by weather, time, and behavior. Helps a lot.
That’s the goal — small changes compound. Glad it worked for you!
Do you use any software or spreadsheets to track changes? I’m thinking of getting more systematic but not sure how to start.
Question: when the guide says “outlast the season” — how often do you all check cameras in big public lands with lots of foot traffic? I don’t want to get caught by rangers but also don’t want my gear stolen.
On public lands, check them less frequently but use lockboxes and camo; every 3-4 weeks is common. Also check local regulations — some areas have rules about baiting or cam placement.
I go every 3 weeks and use a camo lock box and map plot so I can be quick and stealthy.
Great breakdown — loved the “Choose the Perfect Vantage” tips. I moved my cam to a pinch point near a creek and noticed way more bucks in the evening.
Question: for a south-facing trail, would you still recommend 12MP over 20MP to save battery? I do mostly night shots.
For night shots, you can usually stick with 12MP to save storage and battery — the image quality is still good in IR. If you plan to crop a lot or print, go 20MP, but expect shorter battery life.
I run 12MP and swap cards monthly. Night images look sharp enough unless you’re zooming in a ton.
Also try lowering the trigger sensitivity a touch if you’re getting a lot of false trips from brush — helps preserve battery.
LOL the guide made me rethink my placement — I was just sticking cams wherever. After moving one to a deer trail intersection, I got a buck with a 10-point exactly at sunset. 🦌
Also, anyone else forget to lock the SD card door and lose a memory card? smh
Haha been there. I wrap the door seam with camo tape after installation — keeps critters and light rain out.
I lost one last season to a raccoon or maybe it fell out. Now I use adhesive backed Velcro and a cable lock.
Nice result! And yes, SD card security is underrated. If your model supports it, anchor the cam with a security box or use a python lock for peace of mind.
I tried the fast trigger + NO flash setting like the guide suggested for night bucks. Results: fewer spooked deer but a lot more blurry pics because they pass fast. Any tips?
Also check for a firmware update — some models improve night performance in updates.
Or set burst mode — multiple shots increase chance of a clear frame even if movement is fast.
Try increasing shutter speed if your camera allows, or back off the sensitivity just a touch so it triggers a fraction later — that can reduce motion blur. Also test slight angle changes to capture broadside frames.
I use burst + 0.5s recovery on mine and get more crisp images. Worth experimenting.
I appreciate the “Time It Right” advice. The rut window in my area is all over the place though — any tips for pinning it down more accurately?
Check local state wildlife reports for breeding/activity timelines and pair that with your past camera data (section 6). Look for increased daytime movement and vocalizations as indicators.
Use old photos from mid-Oct to late Nov to see patterns. Also, hunter forums for your county can be helpful — folks often post sightings.
Mounting and Camouflage section was spot on. I used burlap and natural foliage last season and my camera lasted 3 months without being noticed. 😂
Two cents: avoid mounting on a tree with a deer rub line — they’ll chew the tree and sometimes knock the camera out.
Haha same here — my cam had a tiny rub mark after a curious buck. Learned to mount slightly off the rubbing surface.
Pro tip: use a zip tie on top and a camo strap underneath the housing for extra stability.
Good tip on the rub line — animals can definitely shift cams. Burlap’s great as long as it doesn’t touch the lens or motion sensor.